For Proofreading, Copy-editing, Substantive Editing of Research or Conference Papers, Reports, Manuscripts, Thesis; call: +255 716 23 1772 or E-mail: jaba@udsm.ac.tz

Pages

Monday, June 3, 2013

How to unblock my Hotmail account?


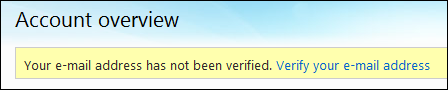
If your MSN/Hotmail Account has been hacked! 

If your MSN Account has been hacked, go to MSN email support: 

You need to follow the password reset link and when it comes to the three options of how you want to change your password click on the last one, customer support and then fill out the form! 

You have to give all information about your problem and about your identity: 


Your e-mail (the "Windows Live ID"). 


Your first name and full name. 


Your date of birth (month / day / year). 


Your country. 


The state, province or department in which you reside. 


Your zip code. 


The IP address of each computer used to access your account, or the most commonly used. To find your IP address, visit : http://www.monip.org/ 


The answer to your secret question (if you don't remember it, notify it). 


Emergency address email registered for this account (if no emergency address, notify it). 


Your Internet service provider (at work or at home). 


The date and approximate time of your last log-in


For Windows Live Hotmail user: 


Examples of files names which you created in addition to those existing by defect 


Examples of contacts contained in your address book. 


Examples of old email titles contained in your inbox folders or messages. 


For Windows Live Messenger user: 


Examples of contacts contained in your contact list. 


The nickname under which you appear on Windows Live Messenger. 


VERY IMPORTANT! Write your request in a clear and understandable English, avoiding the SMS language, spelling and abbreviations ! 

Note: Remember this is the only way you can expect to recover your account!

Why do I need to verify my Microsoft account / email address?

We require that you verify your email address when you use it to create a Microsoft account or when you add it to your existing Microsoft account. That way, we can verify that the email address doesn't belong to someone else. To sign in to Microsoft products and services, you have to verify your email address.

When you sign up or add an email address to your account, you automatically receive an email request to verify your address. To verify, just follow the link in the message.

If you try to sign in using an email address that hasn't been verified, you're asked again to verify it.

If you need a new verification link for an email address you added to your Microsoft account, request that a new link be sent to you in email.

To request verification email

1. Go to the Microsoft account overview webpage, and then sign in with your Microsoft account.

2. Click Verify next to the email address, and then click Send me verification email.

How do I verify my Windows Live email address?

When you log in to the Microsoft Windows Live network using http://account.live.com/ (I have deliberately not made that a clickable URL, btw. Copy and paste or type it in for yourself to ensure you aren't getting tricked!) the first thing you should see is:

windows live verify email address 1

Click on "Verify your e-mail address" and...

windows live verify email address 2

Make sure that's the address you desire to verify (if not, you'll need to tweak some settings to update it) then click on "Send e-mail".
Message sent!

windows live verify email address 3

Within a few minutes in the mailbox, you'll see a message similar to this:

windows live verify email address 4

Again, don't click on the link, copy and paste it into your Web browser (darn those hackers and their phishing attempts anyway!). Assuming everything works properly, here's what you'll see:

windows live verify email address 5

Done! Now you should never see the "unverified" error again.

Read more at:  http://www.askdavetaylor.com/how_to_verify_microsoft_windows_live_email_address.html#MTbFPTB2HUm3RAGK.99 

Cannot verify my UberSocial account on BlackBerry

This may be a permissions problem.  Perform the sequence below, then after it reboots, open UberSocial, select 'options' from the menu, then click 'next' and click 'verify account'.

1. Go to the options icon on your blackberry (small wrench icon)

2.a. On new devices go to options -> Applications -> UberSocial

2.b. On older devices go to options -> Advanced Options -> Applications -> UberSocial

3. Set permissions to 'allow' and save the settings.

4. Remove and reinsert your battery in order to do a full device reset.

If this doesn't work, select 'options' from the menu, then select 'network options' and make sure the setting is on AUTO. If it wasn't on AUTO, switch it to AUTO, then save the settings, then select 'options' again from the menu, click 'next' and then click 'verify account'.

If this doesn't work use 'feedback' from the menu and tell me exactly what the error message says that comes up when clicking 'verify account'. Also tell us if your device is configured on a corporate BlackBerry Enterprise Server (BES), or if you subscribe to a BlackBerry Internet data plan.

How do I verify my PayPal account?

You can use your debit card, credit card, or your bank account to verify your PayPal account. When your account is verified, the sending limit and withdrawal limit on your PayPal account will be lifted.

Here's how to verify your PayPal account:

1. Log in to your PayPal account.
2. Click Get Verified below your name.
3. Follow the steps to become verified.

How do I confirm my bank account (PayPal)?

You’ll be able to confirm your bank account once you’ve added your bank account and completed the random deposit process (this is when you authorise PayPal to deposit 2 small, random amounts into your bank account, which should clear in 2 or 3 working days) and obtained both amounts from your bank statement.
Here's how to confirm your bank account when you know the amounts:
  • Log in to your PayPal account.
  • Click Profile at the top of the page.
  • Click Bank Accounts under Financial Information
  • Choose the bank account to be confirmed and click Confirm
  • Enter the two amounts and click Submit
If the correct amounts are entered you will be taken to the Australian Bank Agreement page. Read the Agreement and click I Agree at the bottom of the page to complete the bank funding process. Your sending and withdrawal limits are also lifted and your PayPal account is verified.
If you haven’t added a bank account or completed the random deposit process, here’s what you need to do:

  • Log in to your PayPal account.
  • Click Profile at the top of the page.
  • Click Bank Accounts under Financial Information and follow the prompts to add your bank account.
Return to PayPal and complete the confirmation process shown above once you’ve obtained the random deposit amounts from your bank statement.

How To Verify My YouVersion Account?

How To Verify My Account?

When you Sign-up for a YouVersion account, you will automatically be sent a verification email from “no-reply@youversion.com” that will come to the email that you used in the sign-up process.

It is best to open this email using a laptop / desktop with a full browser (not your mobile device) so that the weblinks work right. Open your verification email and click on the link in it. This verifies your account so you can Sign-in.

I signed up but I don’t think I got a verification email?

1. Check your email inbox again and look for an email from no-reply@youversion.com  on the date that you signed up. Did you receive your verification email? If yes: Open the verification email and click the link inside. This verifies your account.  (you may ignore any oops message). If no: Check your spam folder. Mark the email it as not spam; open the email, and click the link inside. (you may ignore any oops message).
If you still cannot find your verification email, your SPAM filter probably blocked it entirely.  To get around that, create a new “person” in your email address book with:


2. Then fill out the form here: http://youversion.com/resend to have the verification email resent.   This time it should not be rejected by your spam-filter and it should appear in your inbox.   Open the email, and click the link inside. (you may ignore any oops message)   Then you should be able sign-in to the app.

ADDITIONAL INFORMATION:

You must click the link in a verification email before you can sign-in to the app.  If you go to http://youversion.com/resend to have it resent, and you get the message “Account is Already Verified,” then you are in good shape, and you can go sign-into the app with your Email address or username and Password.

How to Verify your Google Account

Verification by email

When you create a Google Account, we'll send a verification link to the email address you used to create the account. Click the link in that email to verify that you own this address. If you don't verify your address, you may not be able to access certain Google products or features.

If you're not sure whether your account is verified, you can find out by signing in to the Google Accounts homepage . You'll see a message asking you to verify your account if it has not yet been verified.

If you already clicked the link to request a verification email, but you haven't yet received it, please check our troubleshooting steps.

Verification by OpenID

If you use a Yahoo! email address to sign up for a Google Account, you'll have the option of verifying that address by signing into Yahoo! with your Yahoo! email address and password. This safe, secure verification is possible because Google and yahoo.com support OpenID , which helps you verify that it's really you on participating websites.

How to verify with OpenID:

Sign up for a Google Account with a Yahoo! address (including any address ending in yahoo.com, ymail.com, or rocketmail.com).

On the next page, click "Verify by signing in at yahoo.com."

The Yahoo! sign-in box will appear. Enter your Yahoo! email address and password, then click "Sign in."
A screen will appear asking if you agree to allow www.google.com to use your Yahoo! ID to share your Yahoo! info. Click "Agree" if you would like to proceed.

You're done! With a verified Google Account, you now have access to a variety of products and features.
Always check the address bar of any page asking for your username or password to make sure it can be trusted. Google will never ask for your username or password in an email, and you should never disclose personal information such as your sign-in credentials, bank information, or credit card number over email.

How do I verify my iCloud account?

1. Go to your iTunes

2. Click the iTunes Store

3. In the top right cornor is your Apple ID, click the "Account" option. 

4. Edit your Apple ID 

5. Enter in your everyday email account (e.g. johnsmith@hotmail.com)

6. Click "Done

7. It'll go to your info, to verify how you use your iTunes Account, go to the very bottom and click "Done"

8. Go to your iPod "Settings

9. tap "iCloud"

10. Make sure your email shows up. 

11. Your iCloud account is now verified.

12. Go back to "Settings"

13. Go to "Store

14. Click "Apple ID:"

15. Sign Out

16. Enter in your email, and your Apple password. (Not your email password)

Note: You need to do the changes I've given you 12-16 in order to download your apps.

Sunday, June 2, 2013

Verify Your Facebook Account

By Nick O'Neill.

Have you noticed an alert prompting you to enter your phone number of credit card in order to verify your Facebook account? Many users have reported seeing the prompt and they are getting frustrated. Especially those individuals who don’t have a mobile phone or a credit card!

While you may think that most people have a mobile phone number or a credit card, there’s a large group of Facebook users who don’t (see this Facebook thread). Unfortunately for those individuals Facebook has a larger problem that they’re dealing with: hackers and spammers. In recent months the volume of Facebook spam and hacking has reached new levels.

Facebook is taking the human verification process to new levels not just to improve their database of verified identities, but out of necessity. It’s an interesting dynamic in that improving their automated “human verification” process adds a significant amount of business value as well. If you’re hoping for Facebook to eliminate these automated systems anytime soon you are out of luck.

Facebook is only increasing these systems to prevent spam and security breaches. The result is that if you don’t verify your identity, you’ll have to enter a captcha every time you make a post on a wall or comment on a status update. The reality is that you’ll need to figure out a way to verify your identity. If you don’t have a phone number or a credit card, you can try driving across the country as this woman did.

Confirm Phone Dialog

Source: http://allfacebook.com/verify-facebook-account_b19186

How do I verify my developer account?

Facebook has several features in place to limit the potential for spam and abuse on the site. Verifying your personal Facebook account helps you retain control of your account and apps on Facebook.

There are two ways to verify your account:


  • You can verify your cell phone, which allows us to verify that a real person is in control of the account. Learn about this process.


Unfortunately, if you can't verify with a cell phone or add a credit card, you may be unable to verify your account. All developers must be verified before they can create a new app.

How do I verify my Facebook user account?

The simplest way since then has been to go to the page for confirming your telephone number at http://facebook.com/confirmphone.php. Another way has been to add your credit card to your profile by buying some ads.

Of late, Facebook has tried to hunt down all existing spam accounts on the platform and thus users who might already have verified their account in one way or another have been asked to verify them again. This is probably due to some kind of behavior they omit on the platform.

How do I verify my Facebook account?

After you log in, you can verify your account by adding a mobile number to it. Enter your mobile number, starting with the country code (E.g: 1 for US numbers). We'll send you a confirmation code as a text message. Enter this code into the space provided to verify your account.

You can also do this from your Mobile Settings page (Account > Account Settings > Mobile).

Note that you can only use your mobile phone to verify one account.

After you verify your account, you can take advantage of more of Facebook's features. For example, once your account is verified you can personalize your timeline URL by adding a username to your account.

I did not receive a code to verify my Facebook account.

If you're having trouble receiving a code to verify your account you can request a new code. There are two ways to do this:


  • Click the Verify link under the captcha (words in the box) that you see when sending friend requests.
  • Enter your mobile number on the mobile confirmation page. Choose your country code, then enter your number without any special characters (+ or -) or leading zeros.


Note: If you see a message that says you have reached the code limit, please wait a couple of days and try again. 

How to get verified account from twitter

1. Determine if you qualify for a verified Twitter account. Twitter verifies as few accounts as possible and only for legitimate reasons. Reasons for asking Twitter include being a highly recognizable public figure (athletes, artists, public officials, public or government agencies, etc.), or if your name and likeness is parodied or impersonated on multiple Twitter accounts, leading to identity confusion.

2. Read the Verified Account terms. These terms explain what a verified account is, what it means to be verified, who has the verified badge, identifying a verified account, etc. They can be found here.

3. Find out how to apply for a verified account. Send a direct message to this address and be sure to have the following information ready.

  • Account name
  • Full name
  • Location
  • Official website (you will be given a suggestion to put the Twitter logo or badge on your official website to speed up verification)
  • Bio information (information about yourself in fewer than 160 characters)
  • Primary contact name (referring to the individual who manages the account)
  • Additional Contact Information
4. Wait for Twitter to respond. If you don't get a reply shortly, you can contact Twitter by snail mail or through Twitter. Keep in mind that Twitter deals with a high volume of verification requests, and that it focuses first on the most "highly sought users.

5. Follow Twitter's instructions for verifying your account. If Twitter decides that you qualify for a verified account, they will reach out to you via direct message. Click the link in the direct message to be taken to finish the process.

6. Do not change your account information. Once you have received a verification badge, it is important to keep your account information the same. Changing information, such as your profile image, can cause Twitter to remove the badge, forcing you to contact them again.

Verified Twitter Account: Info

What is a verified account?

Any account with a blue verified badge on their Twitter profile is a verified account. 

Why does Twitter verify accounts?

Verification is currently used to establish authenticity of identities on Twitter. The verified badge helps users discover high-quality sources of information and trust that a legitimate source is authoring the account’s Tweets.

What kinds of accounts get verified?

Twitter proactively verifies accounts on an ongoing basis to make it easier for users to find who they’re looking for. We concentrate on highly sought users in music, acting, fashion, government, politics, religion, journalism, media, advertising, business, and other key interest areas. We verify business partners from time to time and individuals at high risk of impersonation.

We do not accept requests for verification from the general public. If you fall under one of the above categories and your Twitter account meets our qualifications for verification, we may reach out to you in the future.

Why hasn’t my account been verified?

If you think you meet the criteria for verification and have not yet received a badge, please be patient. We are working within key interest areas to verify accounts that are sought after by other Twitter users. We don’t accept verification requests from the general public, but we encourage you to continue using Twitter in a meaningful way, and you may be verified in the future. Please note that follower count is not a factor in determining whether an account meets our criteria for verification.

Besides verification, how can I show my account is authentic?

Linking to your Twitter profile from an official website is the easiest way to confirm the authenticity of your Twitter account. Including Twitter’s follow button on your webpage is the absolute best way to do this. Click here to learn how. Or, visit all help articles about linking to your Twitter account from your blog or website here.

How to identify an official verified account:

  • The verified badge will appear in the top-right portion of a user's profile page just above the name, location, and bio.
  • If the verified badge appears anywhere else on a user's profile page (such as in the avatar or the background) it is not a verified account.
  • The verified badge cannot be used unless it is provided by Twitter. Accounts using a badge as part of profile pictures, background images, or in any way implying false verification will be permanently suspended.
  • The verified badge will also appear next to usernames in people searches on Twitter.
  • The verified badge will have the same color even if users customize the background of their profile page or change the color in the sidebar.

Why do I see two timeline options on verified profiles?

When visiting the profile of a verified user or advertiser, you will see two timeline options - with All or No replies. Some verified users like to reply to mentions from their many fans and followers, but these replies can crowd their profile timeline, making it hard to see their other Tweets that may be of more interest to you. By default, No replies is selected when you navigate to a verified user's profile. If you'd like to see that user's complete timeline, including their @replies, simply click All.